How to import a document
Use the Import Documents & Images screen to bring external files such as scanned documents, referrals, and images into a patient's record. Documents can be imported individually, as multi-page documents, or pasted directly from the clipboard.
Import a document
- Open the patient's record and go to the Documents tab.
- Click Import Doc.
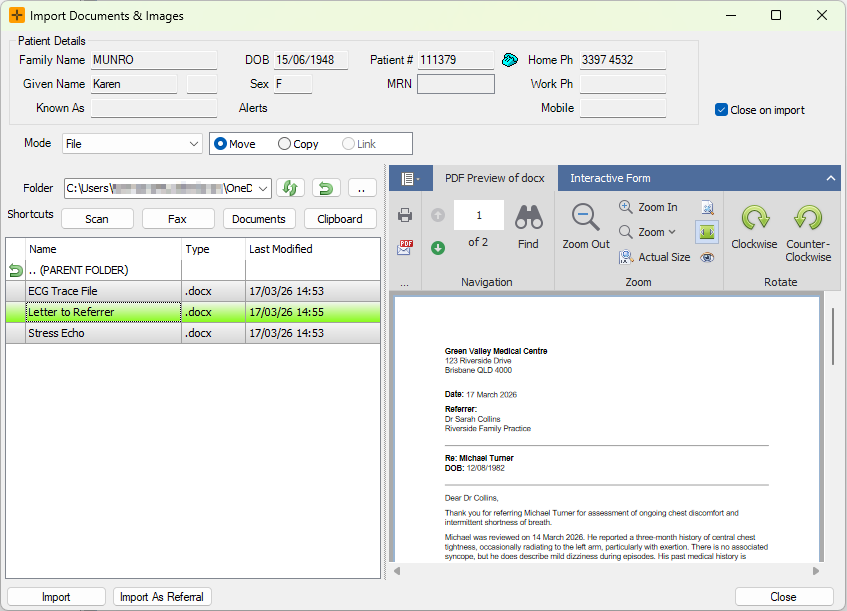
- Browse to the folder containing the file. Use the ... button to browse, or click one of the shortcut buttons (Scan, Fax, or Documents) if configured.
- Select the file from the list. A preview appears on the right where supported.
Close on Import is ticked by default. Un-tick it to keep the Import screen open when importing several files for the same patient.
- Under Mode, select File. (For multi-page documents, see Multi-page Import below.)
- Choose how the original file is handled:
- Move: removes the file from its original location after import.
- Copy: imports a copy and leaves the original in place.
- Click Import.
- In the Classify Document window, select the appropriate folder and update any relevant fields, then click OK.
To import several files with the same classification in one step, hold Shift and click each file in the list before clicking Import.
Multi-page import
Use this mode to combine several individual files such as separate scanned pages, into a single document in the patient's record.
- In the Import Documents & Images screen, set Mode to Multipage File.

- Double-click each file to move it from the upper list into the lower list.
- Use the arrow buttons to reorder the pages as needed.
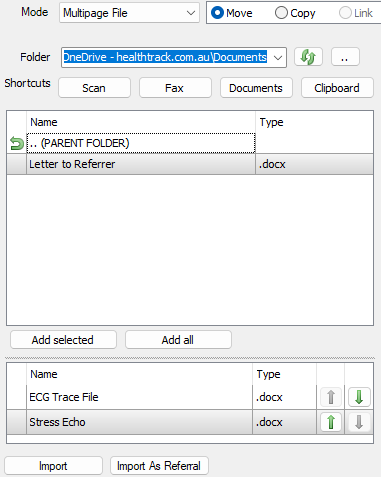
- Click Import, complete the Classify Document window, and click OK.
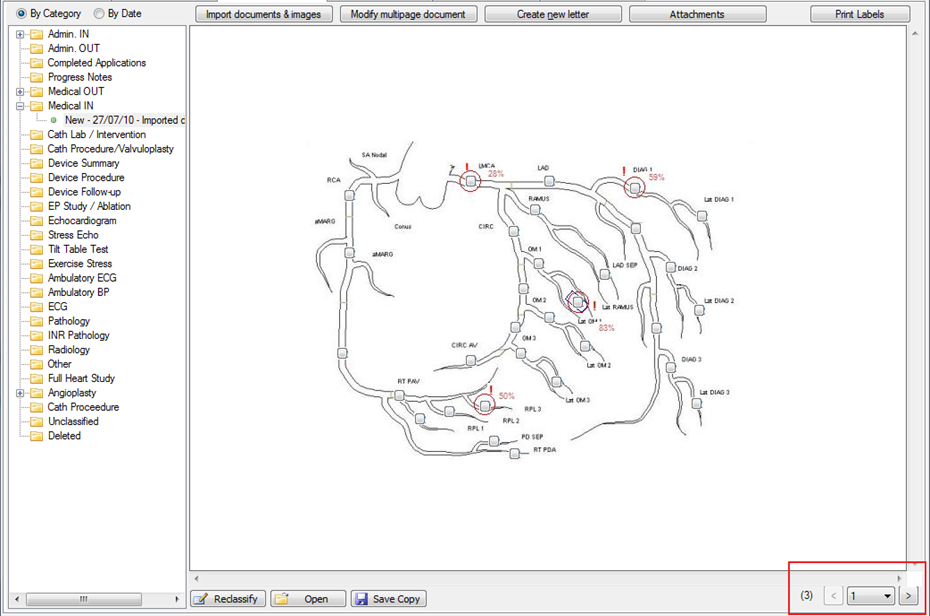
Once imported, use the left and right arrow buttons or the page drop-down in the bottom-right corner of the preview to navigate between pages.
Quick Paste from clipboard
Paste a file copied from outside HealthTrack directly into the import screen using the clipboard.
- Copy the file externally (right-click the file and select Copy).
- In the Import Documents & Images screen, click the Clipboard button.
- Verify the preview, complete the Classify Document window, and click OK.
You can copy multiple files before using Quick Paste - all copied files will be added simultaneously.
Drag and drop
Files can be dragged from outside HealthTrack directly into the Import Documents & Images screen.
- Open the Import Documents & Images screen.
- Drag a file from a folder or desktop and drop it into the screen.
- Verify the preview, complete the Classify Document window, and click OK.
You can select and drag multiple files at once. All selected files will be imported with the same classification.
Setting a default import folder
Each user can set a default folder for imported documents in their preferences. This pre-populates the folder field in the Classify Document window.
- Go to File > User Preferences > Document Management & Importing.
- Set the preferred default folder for imports.
- Click Save and Close.
For more instructions on setting User Preferences, review our Getting Started article here.