What patients see when making an Online Booking
This article describes the patient-facing steps so your team understands the full Online Booking workflow.
Personal details
Patients start by entering their details. Fields marked with * are required. Patients can also attach a referral document (PDF or image, up to 4 MB) and add a comment.
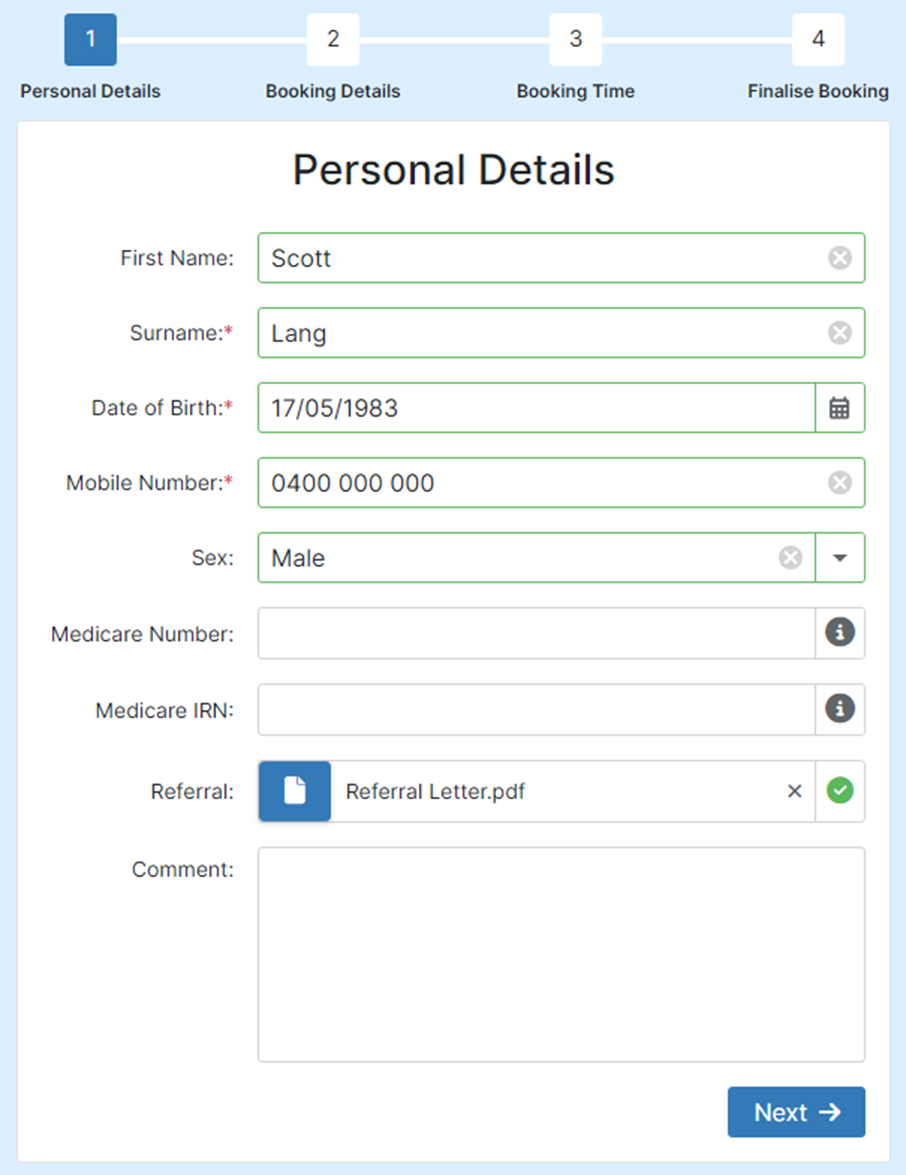
Uploaded files are automatically scanned for malware. If malware is detected, the patient cannot submit the booking.
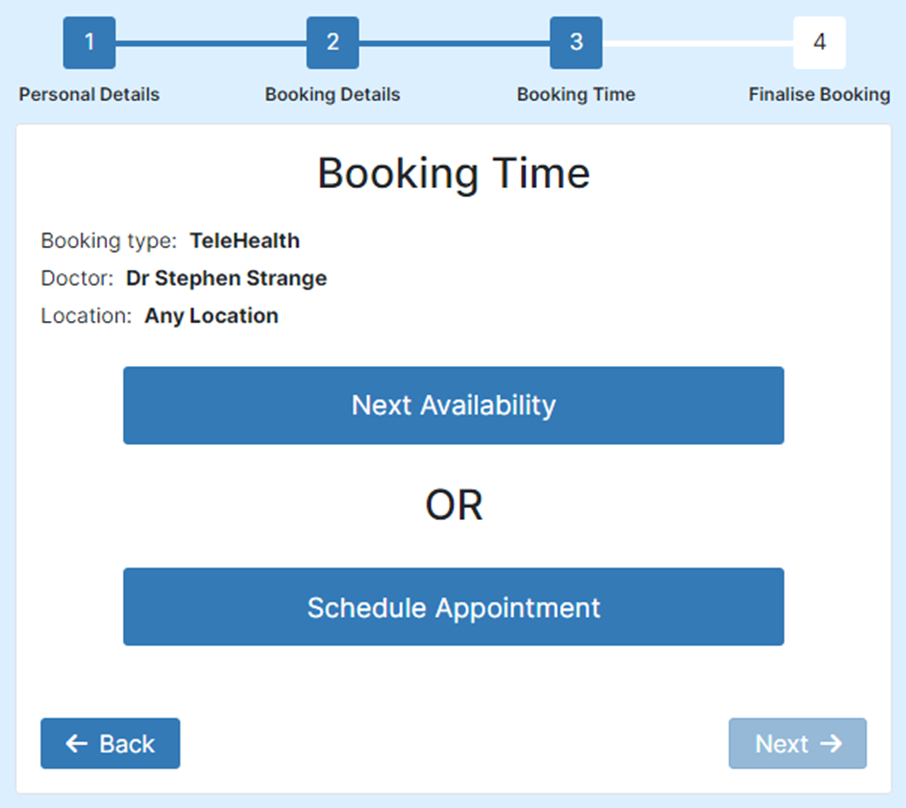
Booking details
Patients then select their preferred Location, Doctor, and Booking Type. Booking Type is always required. If your customisation settings allow it, patients can also choose Any Location or Any Doctor.
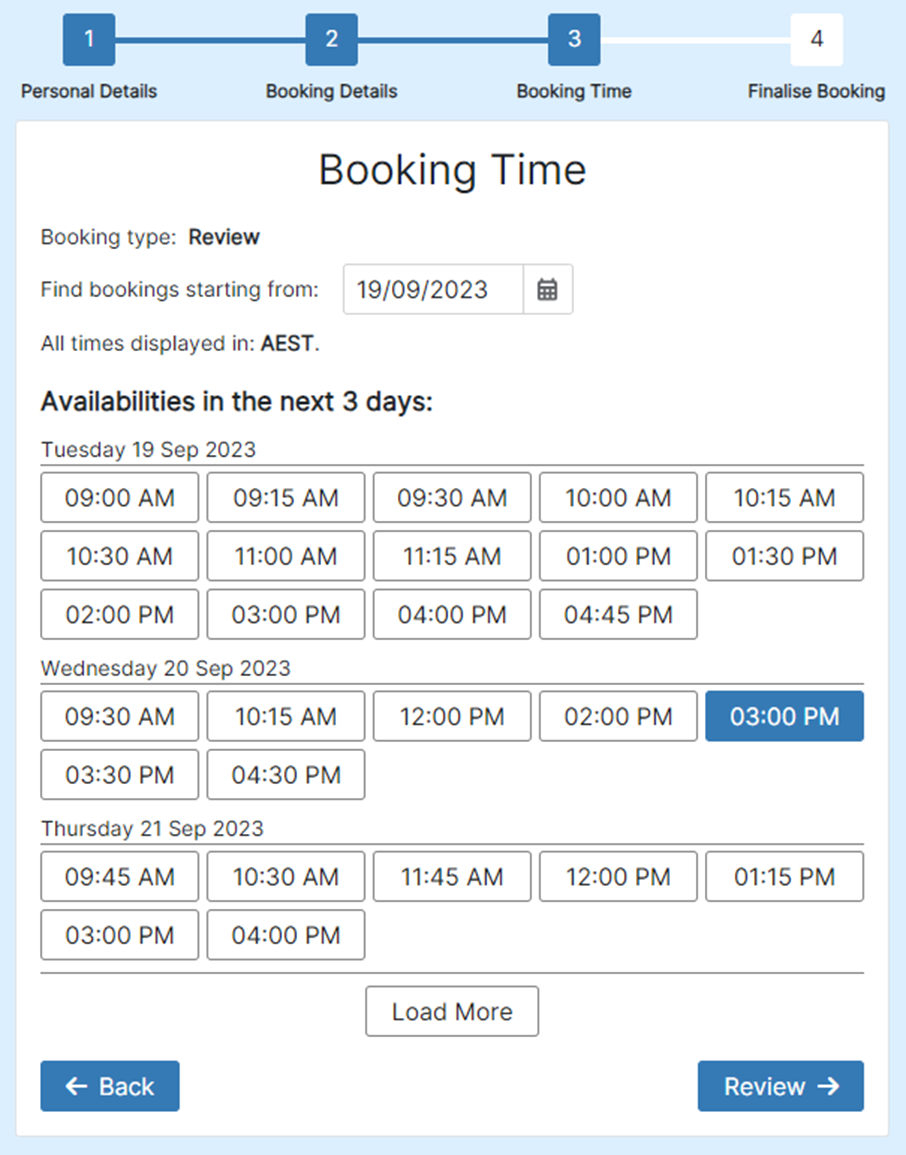
Selecting a date and time
If ASAP Booking is enabled, patients can choose between booking ASAP or selecting a specific time.
If ASAP is not enabled (or the patient selects Schedule Appointment), they see the available slots from your Diary templates and pick a preferred time.
Verification and submission
When the patient clicks Review, an SMS with a verification code is sent to their mobile number. They enter the code to confirm their contact details, then review their selections and click Submit to create the booking.
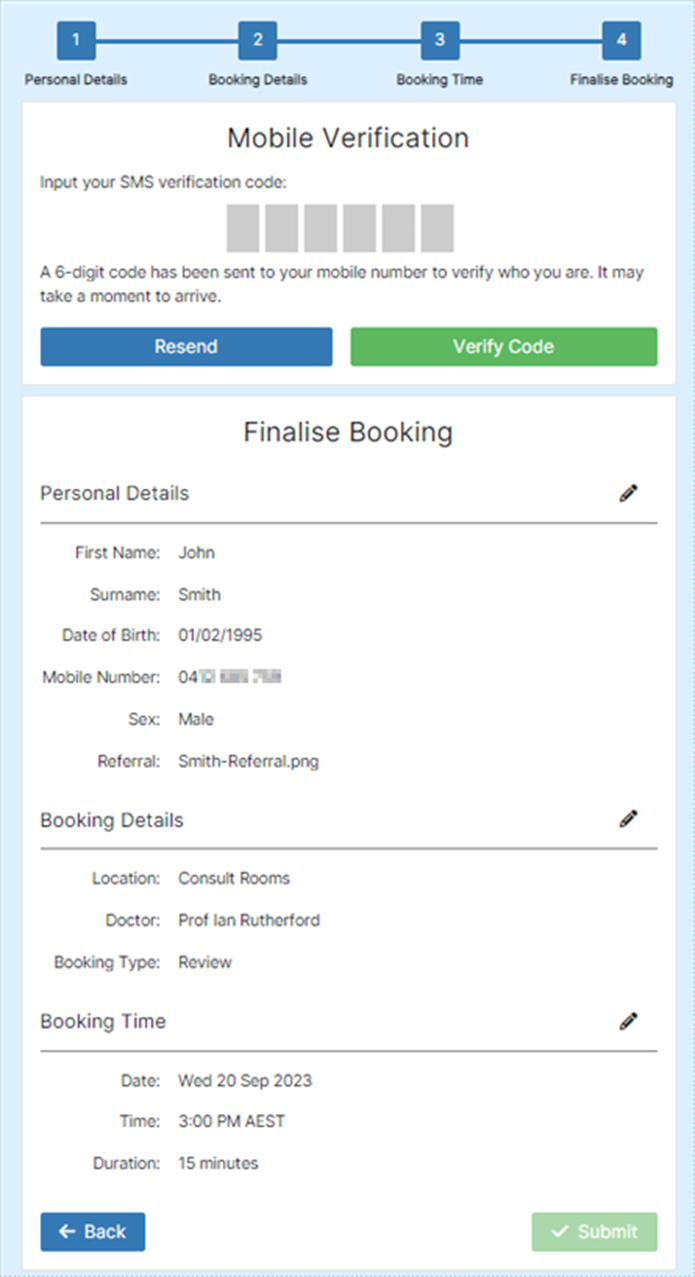
After submitting, the patient sees the Booking Outcome Message (if configured) and can book another appointment or navigate to the Done URL.