How to Approve Incoming Documents
When HealthTrack receives incoming documents such as referrals, pathology or radiology results, it attempts to match them to an existing patient automatically. Documents that are successfully matched appear in the Incoming Documents Approval screen, where a doctor can review and accept them into the patient's record.
Documents that cannot be automatically matched are sent to Incoming Matching for manual matching first. See How to match records to a patient for that workflow.
Open the Incoming Documents Approval screen
- From the menu bar, navigate to Practice Wide > Incoming Approval.
The Incoming Documents Approval screen opens. The left panel lists queued documents. The right panel displays the selected document.

Filter your view
Use the filters at the top of the left panel to control which documents are displayed.
| Filter | Description |
| Doctor | Filter by doctor. Defaults to the logged-on doctor. |
| Location | Filter by practice location. |
Understand the queued items
- Each row in the queue represents one result set. A single patient may have multiple rows if they have multiple pending results.
- Rows are colour-coded by matching status - click on the 'i' button at the bottom of the Queued Items panel to review the rules as outlined below.

- Click a column header to sort the queue alphabetically or by date.
An alert icon in the first column indicates the result contains abnormal findings.
Accept a document
- Click a row in the queue to display the document in the right panel.
- Review the document content.
- Click one of the accept options at the bottom right of the screen:

| Button | What it does |
| Accept | Accepts the document into the patient's record and moves to the next item in the queue. |
| Accept & Go to Patient | Accepts the document and opens the patient's record so you can review the result alongside their other records. |
| Accept & Add Task | Accepts the document and opens the task creation screen for a follow-up task related to this patient. |
| NOT Required | Removes the document from the queue without accepting it. The document is moved to the result store and does not appear in the patient's record. |
Accepting a document moves it permanently from this screen into the patient's Clinical Records tab. This action cannot be undone from this screen.
Rematch a document
If a document has been matched to the wrong patient, you can send it back for rematching.
The rematch options at the bottom left of the screen are only available for System Matched and User Matched documents.

| Button | What it does |
| Rematch Now | Opens the matching screen so you can search for and select the correct patient immediately. |
| Send for Rematching | Returns the document to Incoming Documents Matching to Patients for another staff member to match later. |
Rematch to the correct patient
- Click Rematch Now . The rematching screen opens.
- Review the list of potential patient matches in the lower half of the screen.
- Click a patient to compare their details against the document.
- Once you have identified the correct patient, choose one of the following:
- Matched - confirms the match. The row colour changes to teal and the document can now be accepted.
- Matched & Update Patient Record - confirms the match and opens the Merge Patient Details screen to update the patient's demographics from the document.
- Not Matched - sends the document to the Incoming Documents Matching to Patients screen for further review.
Incoming Document Setup
- Doctors can set up their preferences for how internal documents are to be handled. They can use the default settings for the site or their own settings for who approves the document and where it is saved. Doctors can select a secretary to approve their incoming documents.
- To do this, go to File > User Preferences and select the Incoming Document Setup button in the Document Management and Importing tab.
Admin can view doctors' Incoming Documents Import Setup by going to Admin > Maintenance > Incoming Documents Setup.

- A specific secretary can be selected from the drop-down list in the Secretary column.

-
To change the folder where documents are saved, select a custom folder by clicking in the radio option and selecting the folder.
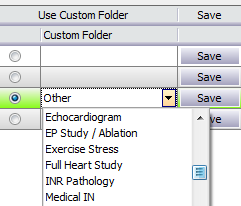
- After saving all changes, select Close.