How to import documents using a barcode
The HealthTrack HIBC (Health Industry Bar Code) Barcode Importer files scanned documents to the correct patient automatically, using a barcode printed on a header sheet. Once configured, no user interaction is needed for routine imports - place the stack of scanned pages in the scanner and HealthTrack files them to the correct patient.
How barcode import works
The barcode is read by your scanning equipment, not by HealthTrack. HealthTrack has no built-in scanner and does not decode the barcode from the scanned image. What HealthTrack reads is the file name.
The flow is:
- Your scanner, with its barcode-reading software, scans the stack, reads the barcode on each header sheet, splits the batch into separate documents, and names each output file with the value held in the barcode.
- HealthTrack watches the scanner folder, reads the name of each new file, and files the document to the patient the barcode identifies (and, for Diary-printed sheets, records the booking type and date).
Because HealthTrack files each document from its file name, the barcode value needs to survive as the file name. If the scanning equipment mis-splits the batch or names a file incorrectly, the document will be misfiled or will fail to import. See "When the import fails" below.
Prerequisites
Before using the Barcode Importer, the following must be set up by IT:
- Barcode-reading scanner - a scanner (or scanning software) that reads the barcode on each header sheet, splits the batch into separate files, and names each file with the barcode value. HealthTrack relies on this file name to file the document.
- Scanner folder path - typically
\\server\HMS-Interfaces\HIBC_Scanner - Manual import path - typically
\\server\HMS-Interfaces\HMS_ManualImport - Scanner configuration - set the scanner to "scan to PDF" with the destination set to the Scanner folder path above.
Print barcoded note sheets
Admin staff can print barcoded note sheets in four ways:
| Source | How |
|---|---|
| Diary (bulk) | Click Print in the Diary and choose Daysheet - Barcode for a doctor or location. |
| Single booking | Right-click a booking in the Diary, choose Print (Labels / Info), then Patient Details with Barcode. |
| Patient Demographic screen | Click Print on the patient's Demographic screen, then choose Patient Details with Barcode. |
| Patient Documents tab | Right-click the appropriate folder and select Print Barcode. |

Scan and file notes
- The doctor writes on the barcoded page during the consult and places it in the scanning tray.
- If extra pages are required, use blank pages directly after the barcoded sheet. The barcoded sheet acts as a header for all pages that follow it.
- At the end of the day, place the full stack of pages into the scanner.
- Select the scanner destination set to the Scanner folder path.
- Scan the notes in bulk.
Your scanner separates the pages into patient-specific documents by barcode and names each file with the barcode value. HealthTrack then reads those file names and files each set of notes to the patient's Documents folder (and, for Diary-printed sheets, records the booking type and date).
Re-scanning the same barcoded header sheet updates the existing document rather than creating a duplicate, as long as the same barcode is used.
The barcoded header sheet can also be used to import historical notes, documents, results, or images for a patient. Place the barcoded sheet in front of the older pages before scanning.
When the import fails
Because HealthTrack files each document from its file name, most misfiled or failed barcode imports come from the scanner rather than from HealthTrack: a batch that was mis-split, or a file that was not named with the correct barcode value. If barcode imports are landing in the wrong place or not importing, check the scanning equipment and the barcode header sheets first.
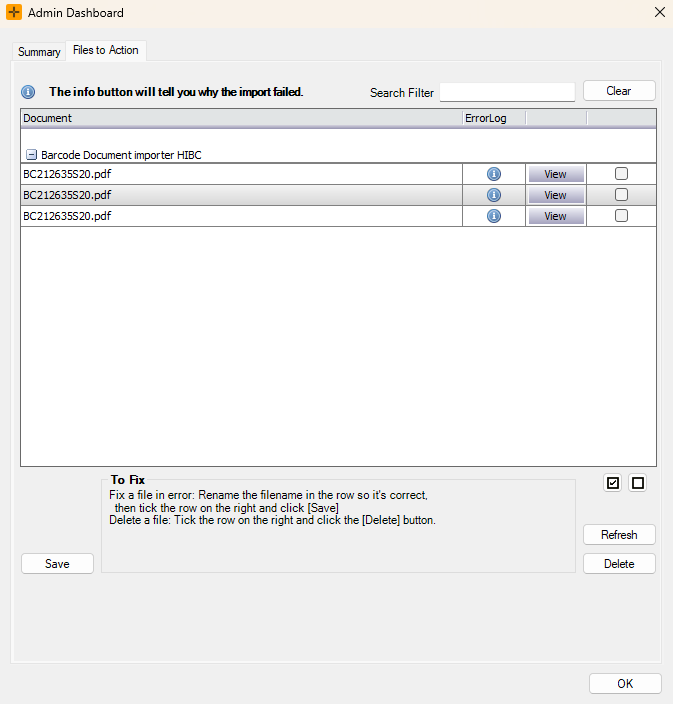
If HealthTrack cannot read a document or barcode, the file is placed in the manual import directory for user intervention.
If the HIBC Barcode Importer encounters a different issue (for example, an attempt to file to a deleted patient's folder), the file is placed in the HealthTrack import error folder. Access these files from Admin > Admin Dashboard > Files to Action.