
How to leave a patient note - Patient Demographic tab
A patient note is a single free-text note held on the patient record at the bottom of their Demographic tab. Use the note box to record important information about a patient that other staff should look at, such as access instructions, communication preferences, or a reminder that applies whenever the patient demographic tab is opened.
Each patient has only one note box. New text is added into the same note box each time, patient notes builds up over time as a single running record.
A patient note is not the same as a patient alert. The note is free text that staff read when they look at the patient record. An alert is a flag that HealthTrack surfaces actively, on the red alert button, in the popup when the patient is opened, and as icons and colours in the Diary. See How to add alerts to the patient for the alert side. The note and the alert flag are described together below under "Flag the Note as an Alert".
Before You Start
You need access to the patient record, demographic tab, that you want to add the note to.
Add or Update the Patient Note
- Open the patient record, demographic tab.
- Click Edit Patient button.
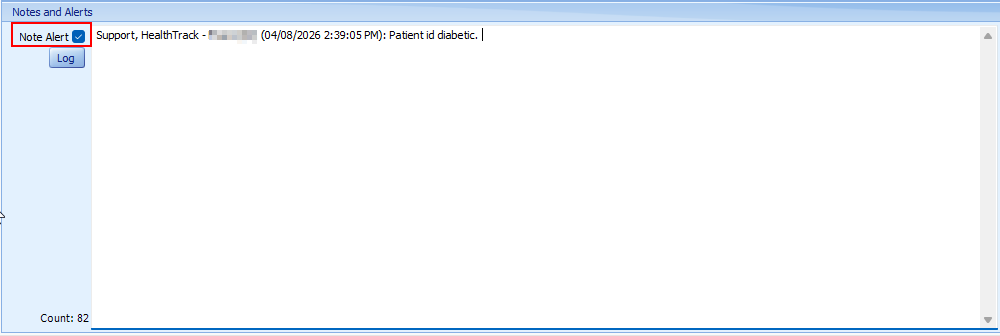
- Select Log to stamp the entry. Log adds your name and the current date and time to the top of the note, then keeps your cursor ready for the text.
- Enter your note text. A character count shows how much you have entered.
- Save the patient record.
The Log button prepends a line in the form of "User (date time):" to the top of the note. This is how HealthTrack records who added what and when. There is no separate note history, the whole note is one field and the stamps are the only record of authorship, so add a Log stamp before entering text when you want the entry attributed and dated.
The patient note is a single field with no per-entry history and no per-entry deletion. On long-standing patients it can grow into a wall of text. Keep entries short and remove text that is no longer relevant.
Flag the Note as an Alert
Beside the Notes box is an alert checkbox. Selecting it turns the patient note into an alert flag on the patient, which is then shown as a patient-note indicator on bookings in the Diary and invoicing screens, so staff know to check the note.
The alert flag lives on the patient, not on the note text. If you clear or replace the note text later, the flag stays on until you clear the checkbox. Clear the alert checkbox when the reason for flagging the note no longer applies.
Notes on Documents (Document Management)
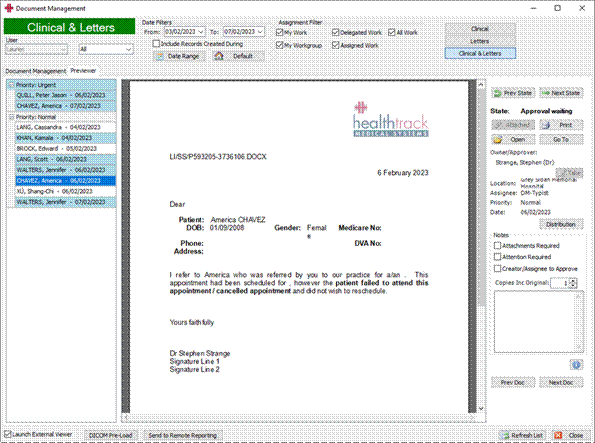
Separately from the patient note, notes can be attached to individual documents and clinical records in the Document Management screen. Use these to flag items that need attention, record instructions, or communicate with other staff involved in the document workflow. These notes are linked to individual documents, they are not standalone entries on the patient record.
Add a Note from the Previewer Tab
- Open Document Management.
- Select the Previewer tab.
- Select the document from the list on the left.
- In the Notes panel on the right, enter your note text in the text field.
- Select any relevant checkboxes:
| Checkbox | Purpose |
|---|---|
| Attachments Required | Flags that the document has attachments that need to be added or reviewed. |
| Attention Required | Flags the document for attention. While selected, the document will not be distributed. |
| Creator/Assignee to Approve | Allows the assignee to finalise the document instead of the Owner/Approver. |
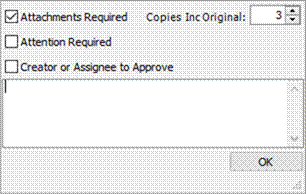
Set the Copies Inc Original field
The Copies Inc Original field in the Notes panel controls how many copies of the document are printed when it is distributed. The value represents the total number of recipients on finalisation, including the original.
Set this value when more than one copy of the document needs to be printed for distribution.
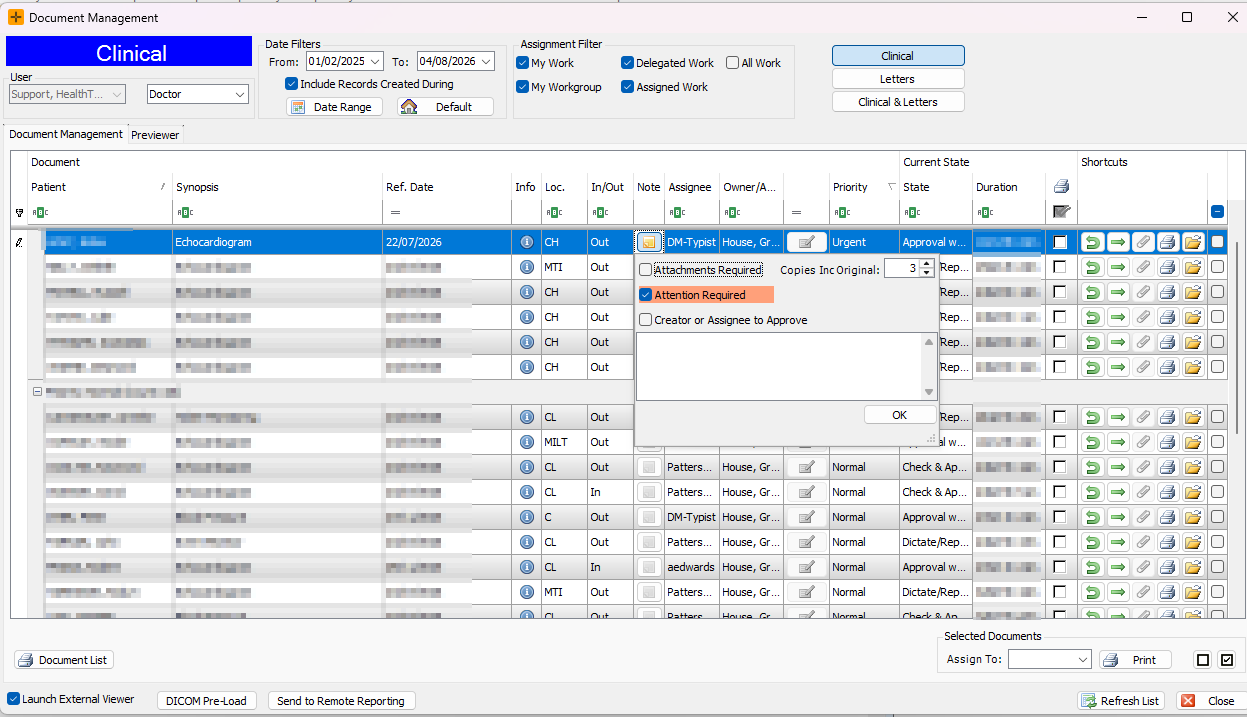
When a document has a note, a yellow sticky note icon appears in the Note column of the Document Management tab.
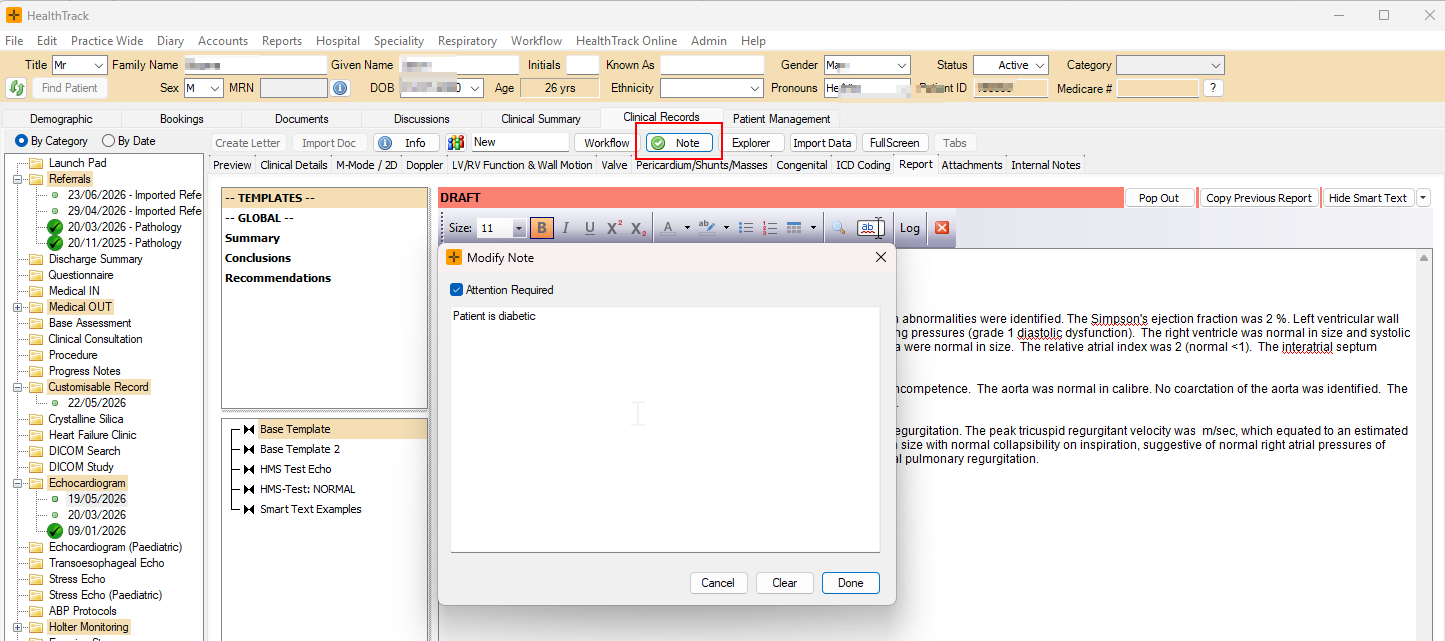
Add a Note from Clinical Records
Notes can also be recorded from the Note button at the top of Clinical Records.
- Open the patient's Clinical Records.
- Select the Note button at the top of the screen.
- Enter your note text and select any relevant checkboxes.
Where Document Notes Appear
| View | How notes display |
|---|---|
| Document Management tab | A yellow sticky note icon appears in the Note column for documents with notes. |
| Previewer tab | The Notes panel displays on the right side, showing the note text and checkboxes. |
Selecting Attention Required prevents the document from being distributed until the checkbox is cleared. Use this when a document needs review before it goes out.