
Re-export a NASH certificate for older Windows servers
Windows Server 2016 reaches end of extended support on 12 January 2027. Mainstream support ended in January 2022. Since then Microsoft has only released security updates, and those stop on 12 January 2027 (Microsoft lifecycle page). If your HealthTrack server runs Windows Server 2016 or earlier, plan an upgrade to a supported version of Windows Server now, or talk to us about moving to HealthTrack Cloud so you no longer need to maintain your own server. A supported server can import new NASH certificates directly, without the steps below.
When to use this guide
Use this guide if importing a new NASH certificate in HealthTrack fails with The specified network password is not correct, and you are sure the PIC is correct.
Newer NASH certificates from Services Australia use stronger encryption that Windows Server 2016 and earlier can't read. If your HealthTrack server runs one of these versions, Windows reports the PIC as wrong even when it is right. Re-saving the certificate on a newer computer lets the server read it.
These steps need the certificate file and its PIC. Keep your PIC private. If you aren't comfortable doing this yourself, ask your IT provider.
Before you start
- The
site.p12file downloaded from HPOS, and the PIC from the SMS. - A computer running Windows 10 or 11. Don't use the HealthTrack server.
The screenshots below were captured on Windows 11.
Step 1: Import the certificate on a Windows 10 or 11 computer
- Double-click
site.p12. -
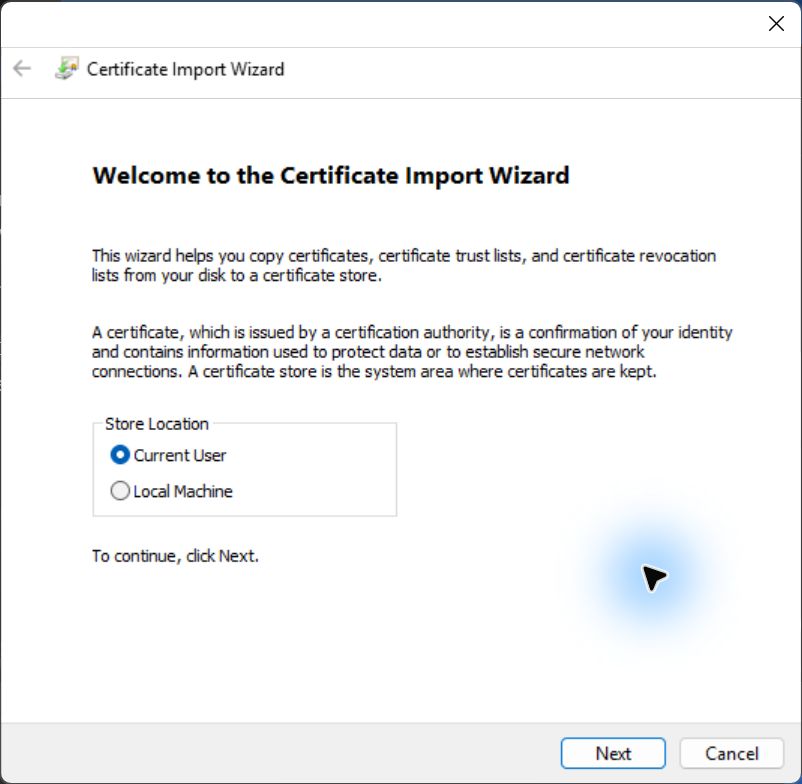
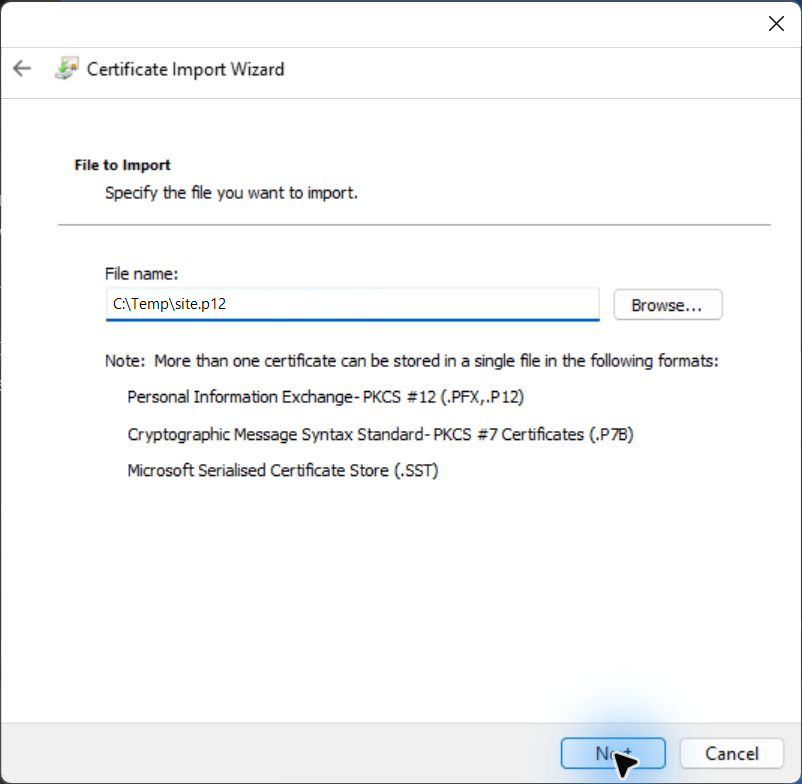
Select Current User, then Next, then Next.
-
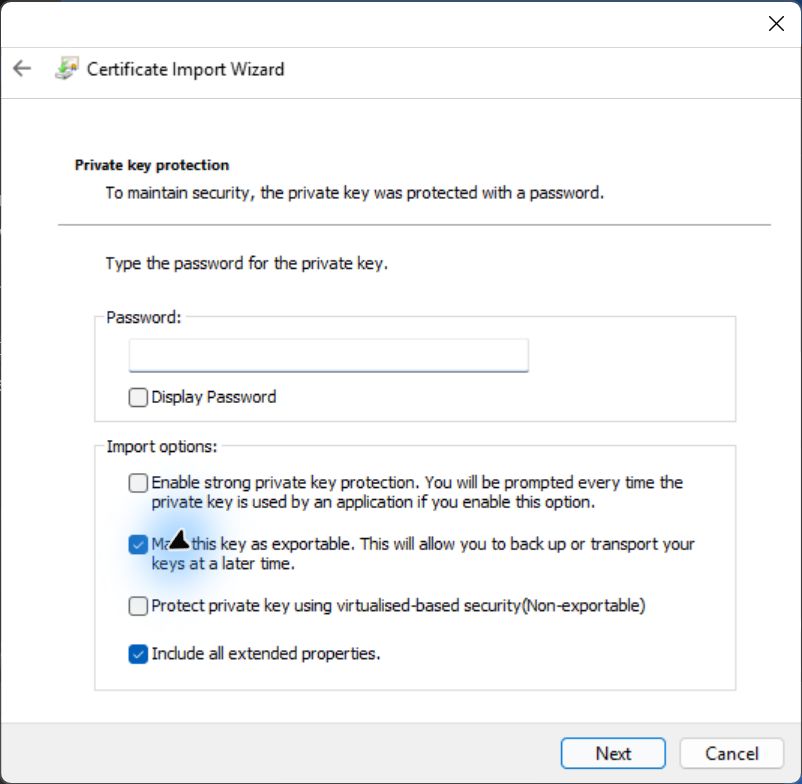
Enter the PIC and tick Mark this key as exportable. Select Next.
-
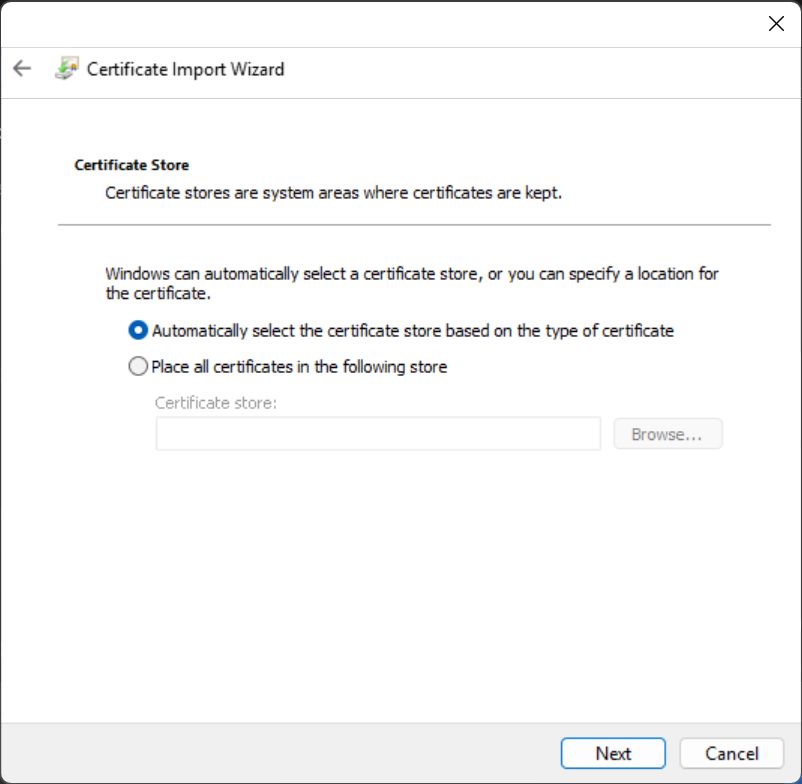
Leave Automatically select the certificate store selected. Select Next, then Finish.
-
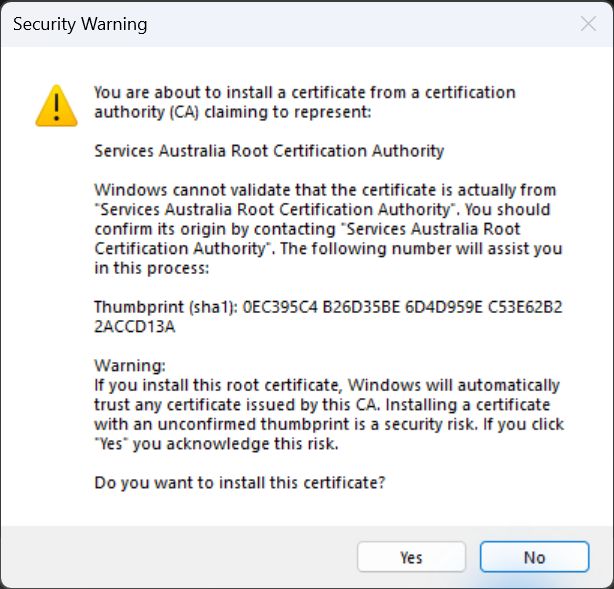
If Windows displays a Security Warning about installing the Services Australia Root Certification Authority, this is a separate request to trust the issuing authority. If the origin and thumbprint do not match the screenshot, confirm the certificate's origin and thumbprint with your IT provider or Services Australia before selecting Yes. Once the import succeeds, select OK.
Step 2: Export it in a format your server can read
- Press Windows + R, type
certmgr.mscand press Enter. - Open Personal > Certificates. Find the certificate issued to your organisation with the new expiry date.
- Right-click it and select All Tasks > Export. Select Next.
-
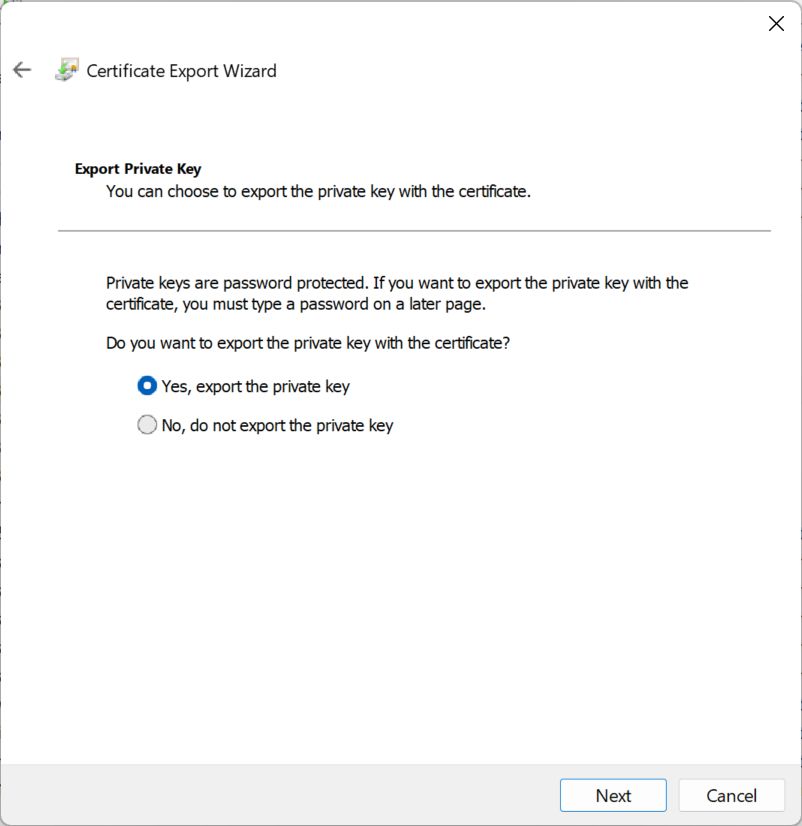
Select Yes, export the private key. Select Next.
-
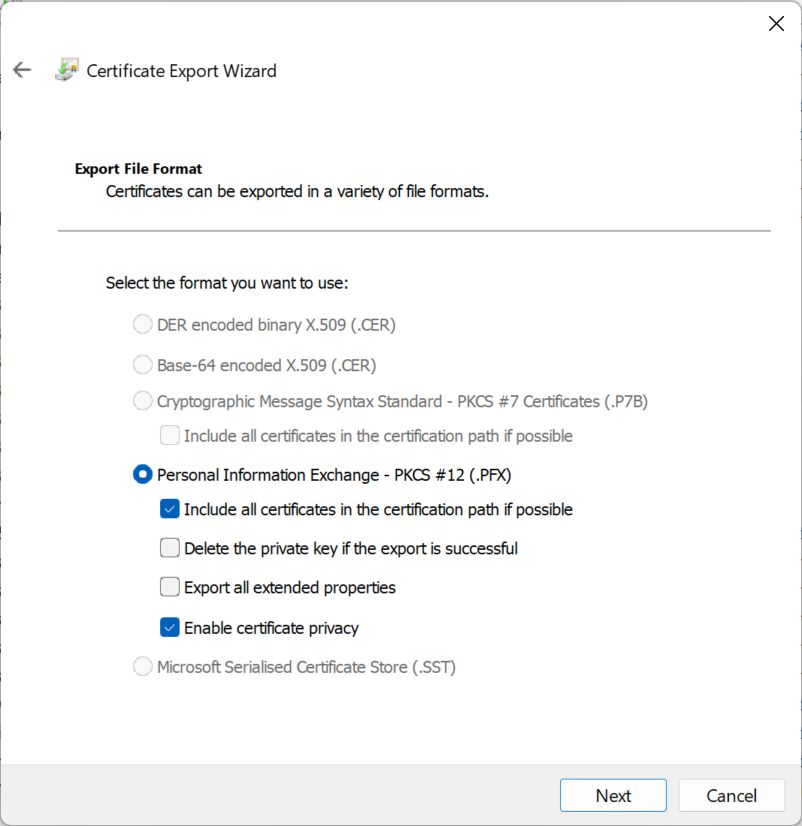
Leave Personal Information Exchange (.PFX) selected and tick Include all certificates in the certification path if possible. Select Next.
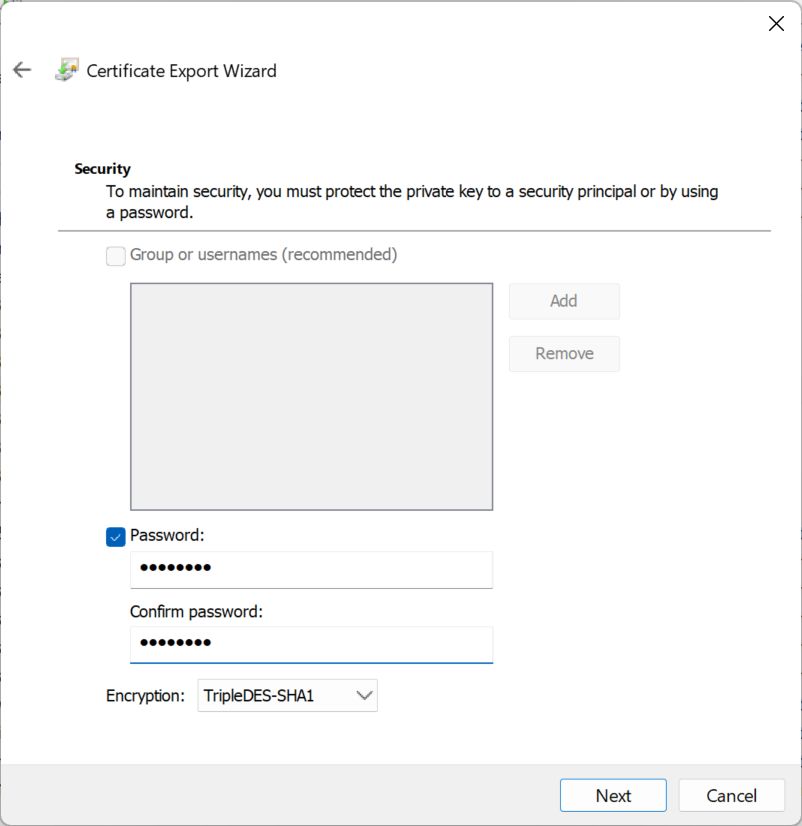
- Tick Password and enter and confirm a new password. You can reuse the PIC.
-
Change Encryption to TripleDES-SHA1. This is the setting that matters. Select Next.
-
Save the file as
site-converted.pfx. Select Next, then Finish.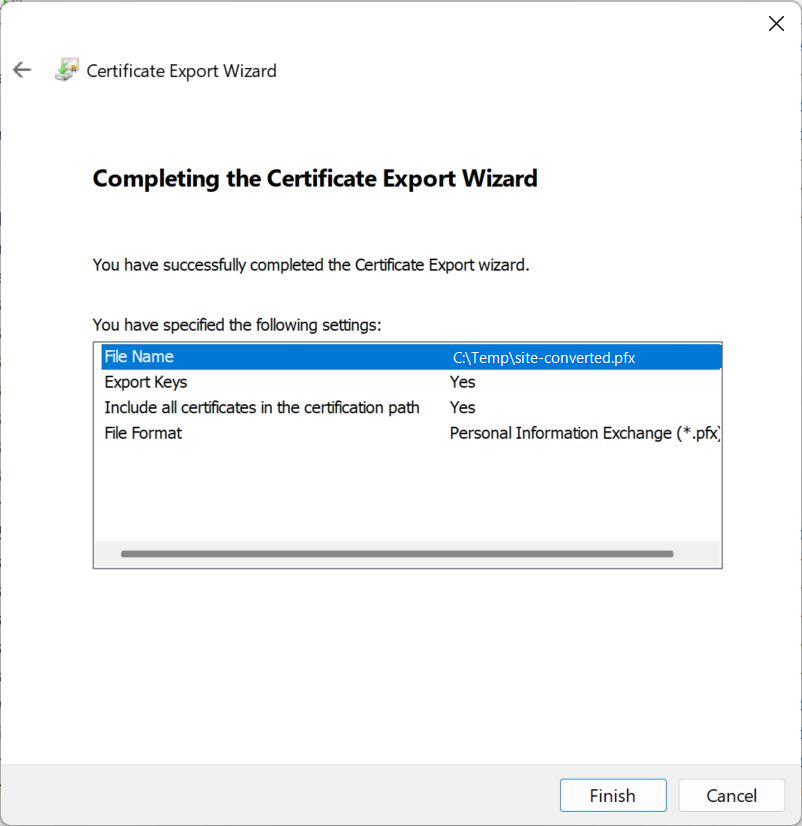
Step 3: Remove the certificate from the computer
- In
certmgr.msc, right-click the same certificate and select Delete. Confirm with Yes.
Step 4: Import the converted file into HealthTrack
- In HealthTrack, go to Admin > Locations & Rooms > Locations & Rooms Manager > Manage HPI-O.
- Import
site-converted.pfxusing the password you set in Step 2. - Update the certificate for each location that uses ePrescribing or My Health Record.
Step 5: Clean up
- Delete
site-converted.pfxonce the import works, including from the Recycle Bin. - Store or discard the original
site.p12according to your practice's security policy.
Still not working?
Contact HealthTrack support with a screenshot of the error. Don't send the certificate file, the PIC or the password.