How to create a new Custom Field
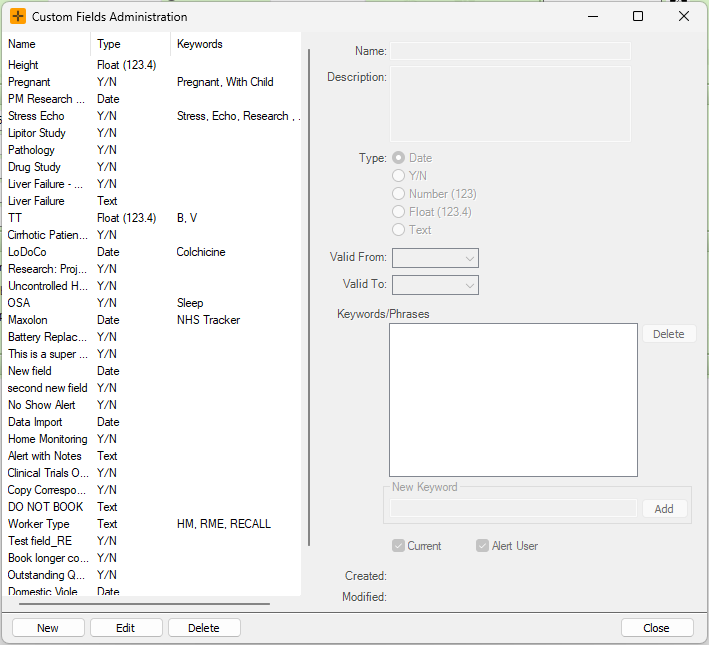
- Navigate to Admin > Custom Fields to open up the Custom Fields Administration screen.
- To create a new custom field, select the
Newbutton. - Populate the details in the right-hand side of the screen.
- Select
Save.
You can use the Advanced Search feature to identify a list of patients with specific custom fields assigned to them. For further details on how to do so, review our Identify Patients Using Advanced Search usability guide article.
Custom Field Details
In the Custom Fields Administration screen, there are a number of details to populate.
- Name: custom field name which will be visible to users when assigned to a patient.
- Description: any additional details regarding the custom field.
- Type: can be categorised as Date, Y/N, Number (no decimals), Float (can include decimals), Text.
- Keywords/Phrases: a future enhancement to come.
- Current: if ticked, this is considered a 'current' option, and can be assigned to a patient.
- If the custom field is no longer required, this check-box can be un-ticked.
- Alert User: if ticked, an alert will be enabled for any patient with the custom field.
- The alert will pop-up whenever the patient demographic is opened, or when the patient is refreshed.
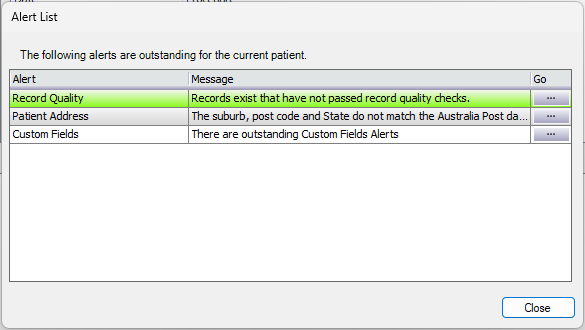
From the Alert List pop-up, you can select the ... icon next to the 'Custom Fields' alert to open the Custom Fields Manager for the patient, and view a full list of what custom fields apply to that patient.
For more detailed instructions on managing custom fields for patients, review our How to use custom fields article.